Back

HOW TO MAKE A DELTARUNE BOX ONLY WITH HTML AND CSS (and a little bit of js)

Icon

Yes, Not using pre made gifs, just html, css and js, (you can make various dialogues that can be skipped by touching or pressing z), heres how:

TUTORAL

Thats what you need:

  • Assets: Your speaker images (charactericon.png, and anotherexpression.png, the second one its optional)
  • yeah, just that, the rest i made it for you

    Step 1:

    First, add this at the start of your <style> tag:

    @font-face {
    font-family: 'Determination Mono';
    src: url('https://oliverspace.neocities.org/determination-mono.ttf') format('truetype');
    }

    and then, you add these to your style tag:

    .dialogue-box {
    position: relative;
    text-shadow: 0.67px 0.67px 0px #0f0f71;
    background-color: transparent;
    padding: 15px;
    padding-top: 0px;
    padding-bottom: 0px;
    margin: 0 auto;
    box-sizing: border-box;
    image-rendering: pixelated;
    font-size: 16.5px;
    line-height: 18px;
    color: #fff;
    border-image: url(
    'https://oliverspace.neocities.org/textbox.gif'
    ) 15 / 15px repeat;

    /* you can change the image border */


    border-width: 13px;
    border-image-slice: 27.6% fill;
    min-height: 84px;
    width: 300px;
    text-align: left;
    overflow:hidden;
    }

    .dialogue-box img {
    position: absolute;
    top: 17px;
    left: 17px;
    width: 48px;
    height: auto;
    z-index: 10;
    image-rendering: pixelated;
    }

    .dialogue-box p {
    text-indent: -9px;
    width: 200px;
    margin-left: 0;
    padding-left: 74px;
    margin-top: 15px;
    display: block;
    white-space: pre-wrap;
    font-family: 'Determination Mono';
    }

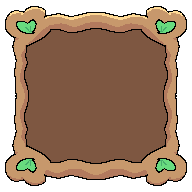
    To Make custom borders, make sure that the border follows the original image template, and just change the border-image, if you want only to an especific dialogue to have custom borders, make another css category with the dialogue with the dialogue id (i will explain it later) after the name:

    #dialogue-box-2 {
    border-image: url('customborder.png') 15 / 15px repeat;
    }

    Example:

    Border Example
    Icon

    At this example, i had to change the css a bit, so it can look good:

    #dialogue-box-2 {
    border-image: url('border_example.png') 50 / 50px repeat;

    /* border size */


    border-width: 10px;
    border-image-slice: 39.9% fill;
    padding-top: 10px;
    padding-bottom: 10px;
    padding-left: 20px;
    padding-right: 20px;
    }

    #dialogue-box-2 p {
    padding-left: 64px;

    /* So it doesnt look strange */


    }

    Step 2:

    Now that the box style is ready, we need the HTML elements to hold the box, the speaker icon, and the text.
    Add this code inside your <body> tag where you want your dialogue box to appear:

    <div id="dialogue-box-1" class="dialogue-box">
    <img id="speaker-img-1" src="nothing.png" alt="Icon">
    <p id="dialogue-text-1"></p>
    </div>

    class="dialogue-box": This applies the custom border and basic structure defined in your CSS.

    id="dialogue-box-1": This is the unique identifier. The JavaScript will use this ID to target and control this specific box.

    id="speaker-img-1": This element holds the character icon. The JavaScript will dynamically change the src attribute of this image as the dialogue progresses.

    id="dialogue-text-1": This is where the dialogue text will be typed out using the animation effect.

    Step 3:

    To handle the typing effect, speaker changes, and user interaction (like skipping text by pressing 'Z' or tapping), you need the external JavaScript file. Place this line just before the closing </body> tag:

    <script src='https://oliverspace.neocities.org/dialogue-box.js'></script>

    Step 4:

    The final step is to create the actual dialogue script that the box will display. This is done by creating an array of objects, where each object represents one line of dialogue.


    The text property is the line of dialogue. You can use \n to create a manual line break within the text.
    The image property is the file path to the speaker icon for that specific line.

    const dialogueA = [
    { text: "* Custom Message 1!", image: "Icon.png" },
    { text: "* Custom Message 67", image: "67.png" }, ];

    if you want to create another dialogue box with different messages:

    const dialogueB = [
    { text: "* Kris is a Stinky Pooper\nlmao", image: "Default_icon.png" },
    { text: "* the\ndialogue\nautomatically\nincreases", image: "Default_icon.png" } ];

    and you need to change the name "dialogueLETTER" for each


    After defining your dialogue arrays (like dialogueA and dialogueB), you must use the dialogueConfigs array to connect them to the correct HTML box ID (e.g., id: 1 connects to id="dialogue-box-1").

    /* consts dialogs up here */


    const dialogueConfigs = [ {
    id: 1,
    script: dialogueA
    },
    {
    id: 2,
    script: dialogueB
    }
    ];
    Icon

    not reading allat